Set Up Your Organization Page
Keep your organization's profile, service area and directory rules up to date in one place.
In the sidebar, under My District, click Organization. The page title is your organization's name. Anyone with an account in your organization can edit it. Each section saves on its own.
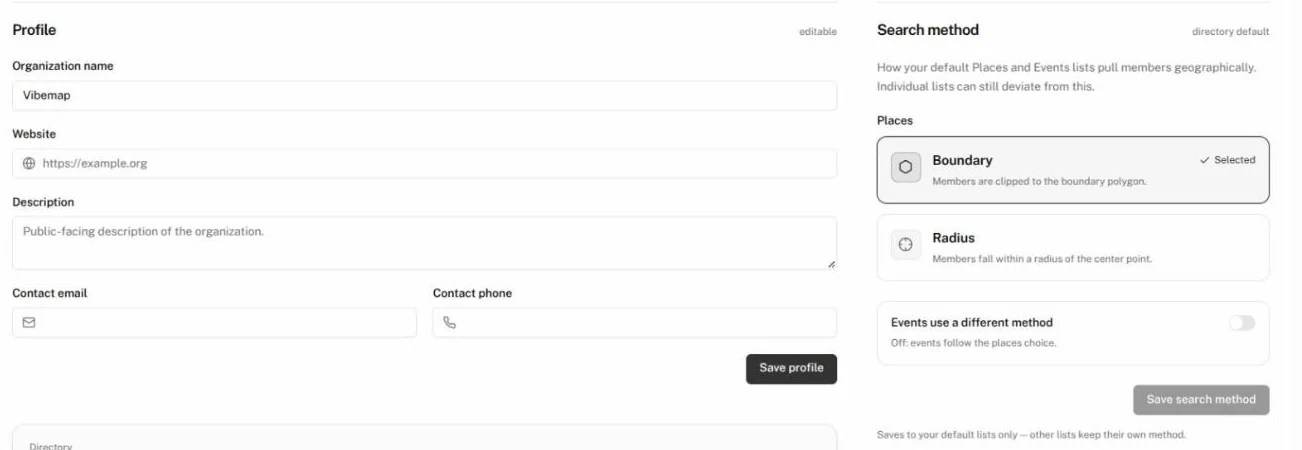
Edit your profile
- Under Profile, edit Organization name, Website, Description, Contact email or Contact phone.
- Click Save profile.
The message Organization profile saved confirms it.
Set your service area
The Boundary panel shows your service area on a map, with its Name and Population below. Your directory rules and the Boundary search method both use it.
Draw or upload an outline. If you have no outline yet, click Draw on the map and click each corner of your area. Double-click the last corner, or press Enter, to finish. Or click Upload a file and choose a GeoJSON, KML or WKT file. You can also drop the file on the map.
Change your outline.
- Click Edit boundary.
- Use the tools above the map: Draw area (or Add area), Split with a line, Split at a street, Upload file or Trace an image.
- Click Save boundary, or Cancel to drop your changes.
Customize a shared outline. If the panel reads Shared boundary · read-only or Official boundary · read-only, other organizations use that outline too. Click Customize this area, then Make my copy. The Hub makes your own copy, named Your organization Service Area, to reshape. The original stays as it is.
Buttons over the map open it Full screen, switch between Clean Map and Theme Map, and show your directory's places (Places).
Set your directory rules
Directory rules set the bar a place or event inside your service area must clear to appear in your live directory. Anything in your area below the bar waits in your Inbox.
-
Set any of:
- Minimum quality tier: No minimum, Gold, Silver, Bronze or Needs work. The lowest tier allowed.
- Minimum completeness: how complete a profile must be, from 0 to 100%. Clear removes the minimum.
- Minimum data sources: how many separate sources must confirm an item.
-
Under Approval policies, set the switches that fit your review process:
Switch When on Submitted events require review Events people submit wait for review before they go live on your calendar. Submitted places auto-approve Places people submit go live without review once they clear your directory rules. With no minimum tier or completeness set, they still wait for review. Collected events require review Events Vibemap collects wait for review before they go live on your calendar. Discovered places auto-approve Places Vibemap discovers in your area go live without review. Review switches apply to events and auto-approve switches to places, so both switches in a pair can be on.
-
Under Event Disclaimer Notice, type a notice to show on event detail pages, such as a box-office disclaimer. A calendar embed can override it.
-
Click Save directory rules.
The message Directory rules saved confirms it.
Add map layers
Org Map Layers & Overlays holds your own map shapes, such as a historic district or bike paths. Every map you build can use them under Layers and Shapes; see Build and Share a Map.
- Click Upload directly.
- In Upload Custom Map Layer, either:
- under Layer File, choose a GeoJSON, KML or raster image (PNG, JPG or TIFF) file, or
- under Import from ArcGIS, paste a public Experience, Web Map or FeatureServer link, click Find layers, then click Import beside the layer you want.
- Give it a Layer Name, then click Upload Layer.
Each layer has a color swatch, a switch that marks it Active or Disabled, and buttons to Style it, Rename it and delete it.
Choose your default search method
Search method, on the right of the page, decides how your default Places and Events lists find their members:
- Boundary: members fall inside your boundary.
- Radius: members fall within a set number of miles of your center point.
- Under Places, click Boundary or Radius. For Radius, set the miles.
- To give events a different method, turn on Events use a different method and choose one under Events. Off, events follow the places choice.
- Click Save search method.
Without a default places list, the Places choices are greyed out. Without a default events list, the events switch doesn't appear. See Build and Manage Lists to set a default list.
This changes your default lists only. Other lists keep their own method. If you have other lists of that type, the Hub offers to switch them too: click Review, tick the lists, then click Apply to N lists. Click Dismiss to leave them as they are.